
In my last post I explained how to build scalable Web API’s with Express and Async/Await. The next chapter in the story is to build a cross-platform front end that consumes the back end Web API. While there are a number of cross-platform UI technologies to choose from, such as Xamarin (C#), Swing (Java) or Kivy (Python), Angular (JavaScript) has garnered attention because it crosses the chasm that has separated web, desktop and mobile platforms, and it’s designed to be used with TypeScript, which increases developer productivity by adding static types and incorporating features from current and future versions of JavaScript.
Clone, fork or download the code for this post: https://github.com/tonysneed/Demo.Express.Angular-CLI
![]()
Starting from Scratch
If you’re getting up to speed with Angular, you’ll want to check out the quickstart guide and source code, which describe how to build an Angular application from scratch. To set up an Angular Hello World app, you’ll need to perform the following steps:
- Initialize package.json
- Install Angular packages
- Set TypeScript options with tsconfig.json
- Configure SystemJS with systemjs.config.js
- Add index.html host web page
- Create root app module
- Create root app component
- Create root app template
- Add main.ts platform bootstrapper
Whew! That’s a lot to go through to get started with a basic Angular application — and you haven’t even added your first component!
Introducing Angular CLI
To keep you from having to perform all these steps manually, Angular has created a tool called Angular CLI (in beta at the time of this writing), which you can use to scaffold new Angular projects, as well as add components to existing projects.

After installing Node.js, install angular-cli globally using NPM (Node Package Manager). While the documentation points you in the direction of creating a new app with Angular CLI, what I’d like to illustrate in this blog post is using Angular CLI to add a web front end to an existing project that includes a Web API built using Node with Express.
Begin with Express
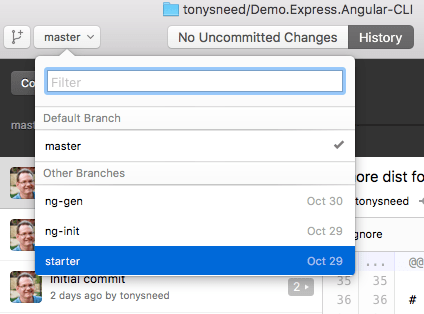
For this purpose, I have created a starter branch in the code repository for this post. If you clone the repo, you can easily switch to the starter branch using GitHub Desktop.
Begin by launching Visual Studio Code by opening a terminal at the repo location and entering code. (you can use another code editor if you prefer). Press Cmd + ` to open the integrated terminal in VS Code and enter npm install to restore package dependencies. In the README.md file you’ll find instructions for building and running the Web API, namely, press Cmd + P and enter task serve-api.
Open a browser to localhost:/3000/api/products, and you should see JSON for several products. Then terminate the running task by pressing Cmd + Shift + P, entering Terminate and selecting the first item. (You may want to create a keyboard shortcut to terminate running tasks.)

Get Productive
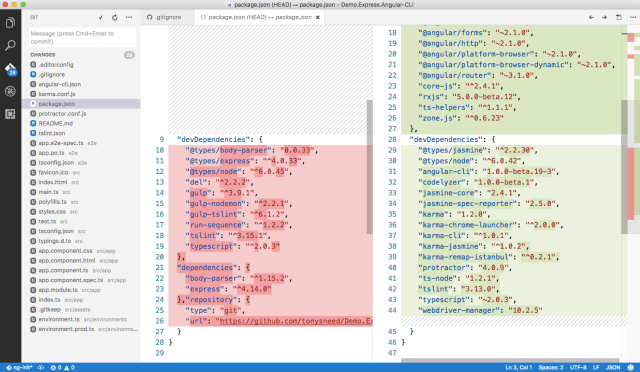
Now that you have a functioning Web API using Express, it’s time to add a front end using Angular-CLI. Open a terminal at the project root and enter ng init. You’ll be prompted to overwrite a few files. Enter Y to overwrite each of the files. Don’t worry, you’ll use VS Code’s Git integration to see file differences and restore the original contents.

Back in VS Code, click on the Git icon to view file changes. To restore the original content to overwritten files, simply select the changed file and copy content from the left to the right side. You don’t need to change tslint.json, and the only change to .gitignore will be to add the dist folder. But you’ll need to copy dependencies from the original to the new package.json file.
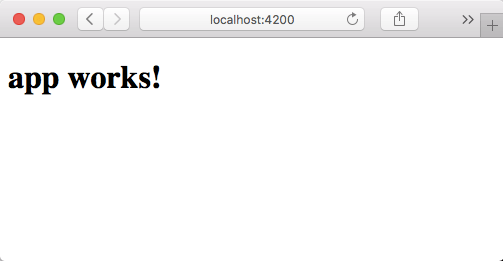
After updating both dev and runtime dependencies, run npm install to add packages required by Angular CLI. Then go back to the terminal and enter npm start, which in turn will run ng serve to start a web server with browser live reload. Open a browser to localhost:4200/, and you’ll see the root app component hosted in index.html.
To prove that live reload is working, you can open app.component.ts in VS Code and change the title property to 'Hello Angular CLI!'. A few seconds later, you’ll see the change reflected in the browser without you having to refresh the page. To stop the web server, go back to the terminal and press Ctrl + C.
Add Some Style
While Angular CLI created a functioning Angular app in very little time, the look is rather plain. To spice things up, you’ll want to add some styling with a framework such as Angular Material or Bootstrap. Because we’re building a straightforward app for this demo, Bootstrap will do fine.
For instructions on adding Bootstap with an app generated by Angular CLI, see the section called Global Library Installation in the ReadMe for the Angular CLI project on GitHub, as well as the ReadMe for ng2-boostrap. Start by running:
npm install ng2-bootstrap bootstrap jquery --save
Open angular-cli.json and insert a new entry into the styles array.
"styles": [
        "styles.css",
        "../node_modules/bootstrap/dist/css/bootstrap.min.css"
],
Next insert two entries into the scripts array.
"scripts": [
  "../node_modules/jquery/dist/jquery.js",
  "../node_modules/bootstrap/dist/js/bootstrap.js"
],
Now you can apply Boostrap styles to HTML in your application. Start by placing a <div> around the <h1> tag in app.component.html and setting class to "container".
<div class="container">
  <h1>
    {{title}}
  </h1>
</div>
This will apply the container bootstrap style to the root app component. You may also wish to apply a different style to elements in the app component. You can accomplish this by setting styles in app.component.css.
h1 {
  color: #369;
  font-family: Arial, Helvetica, sans-serif;
  font-size: 250%;
}
With these changes in place, start the app by running npm start and browse to the home page. You should see a more attractive user interface.

Your First Component
Now it’s time to scaffold your first component — how exciting! Once again, Angular CLI will lend a helping hand. To find out what it can do for you, have a look at the Angular CLI Reference document, which lists top-level commands. Or you can enter ng --help at the command line, and then drill into a command by appending the name of the command you want to explore. For example, to find out about the generate command enter: ng --help generate. From the output you’ll see items you can generate (called “blueprints”).
Let’s start by generating a product class. Since you may wish to share it among various components, you create shared/models directories beneath app, then run:
ng generate class shared/models/product
This will generate a Product class in the shared/models folder, but it doesn’t have any properties. You can simply add a constructor with public parameters for each property you’d like to add.
export class Product {
  constructor(
    public productId: number,
    public productName: string,
    public unitPrice: number) { }
}
Now that you have a model, the next step is to generate a component, which you can produce by running ng generate with the component blueprint. If you’re tired of typing generate every time, you can substitute it with the alias g.
ng g component products
This will create a ProductsComponent class along with an HTML template, a CSS file and a spec file for testing the component, and place them all in a products folder under app.
Angular is a framework for building SPA’s (Single Page Applications) and implements an MVVM (Model-View-ViewModel) architecture, with components playing the role of the ViewModel and templates serving as the View. The way you associate components and templates is by applying an @Component decorator to a component and include a templateUrl.
Open products.component.ts and import Product, then add a title property set to ‘Products’ and a products property that is an array of Product. Later you’re going to set products by retrieving products from the Express Web API in your project, but for now you can simply initialize products in the ngOnInit function to some test products. You should also include an error property in the unlikely event something goes wrong. 🙂
import { Component, OnInit } from '@angular/core';
import { Product } from '../shared/models/product';

@Component({
  selector: 'app-products',
  templateUrl: './products.component.html',
  styleUrls: ['./products.component.css']
})
export class ProductsComponent implements OnInit {

  title: string = 'Products';
  products: Product[];
  error: any;

  constructor() { }

  ngOnInit() {
    this.products = [
            new Product(1, 'Product 1', 10),
            new Product(2, 'Product 2', 20),
        ];
  }
}
Now that you have a component for products, you can create a template by opening products.component.html and replacing generated content with HTML that contains bindings to properties in the component. Angular uses double curly braces for what is called interpolation to evaluate an expression that can refer to component properties. You can also use built-in directives, such as *ngIf and *ngFor to perform data binding in the template. For the products template, we’ll insert an HTML table with bootstrap styling that lists the properties of each product. (Note in the following HTML snippet, you’ll need to substitute left and right brackets and ampersands within the pre tags.)
<div class='panel panel-primary'>
<div class='panel-heading'>
{{title}}
</div>
<div class='panel-body'>
<div class='table-responsive'>
<pre><table class='table' *ngIf="products && products.length"></pre>
<thead>
<tr>
<th>Product Name</th>
<th>Unit Price</th>
</tr>
</thead>
<tbody>
<pre><tr *ngFor="let product of products"></pre>
<td>{{ product.productId }}</td>
<td>{{ product.productName }}</td>
<td>{{ product.unitPrice }}</td>
</tr>
</tbody>
</table>
</div>
<pre><div class="alert alert-danger" *ngIf="error"></pre>
<strong>Error!</strong> {{error}}
</div>
</div>
</div>
Lastly, you’ll need to edit app.component.html to include the 'app-products' selector from products.component.ts.
<div class="container">
<h1>
{{title}}
</h1>
<pre><app-products></app-products></pre>
</div>
Run npm start from a command prompt and navigate to http://localhost:4200/. You should see the products component displayed in the browser.

Connect to the Web API
While we have a products component that works, it does not yet display products retrieved from the back end Express Web API. To accomplish this, we’ll use Angular CLI to generate a products service.
ng g service shared/services/products
Add a private parameter to the constructor to inject the Angular Http client into the products service, then add a getProducts function that calls this._http.get and converts it to a promise, so that you can handle success by calling .then, or failure by calling .catch. Here is the code for the ProductsService class.
import { Injectable } from '@angular/core';
import { Http } from '@angular/http';
import 'rxjs/add/operator/toPromise';

import { Product } from '../models/product';
import { Urls } from '../constants';

@Injectable()
export class ProductsService {

  private _productsUrl = Urls.BaseUrl + 'api/products';

  constructor(private _http: Http) { }

  getProducts(): Promise {
    return this._http.get(this._productsUrl)
      .toPromise()
      .then(resp => resp.json() as Product[])
      .catch(this.handleError);
  }

  private handleError(error: any): Promise {
    console.error('An error occurred', error);
    return Promise.reject(error.message || error);
  }
}
In order to use ProductsService, you’ll need to add it as a provider to @NgModule in app.module.ts, after importing the ProductsService module. Lastly, you’ll need to refactor ProductsComponent to use ProductsService, by adding a private parameter to the constructor, then calling getProducts to set the products property if successful or the error property if unsuccessful.
import { Component, OnInit } from '@angular/core';
import { Product } from '../shared/models/product';
import { ProductsService } from '../shared/services/products.service';

@Component({
  selector: 'app-products',
  templateUrl: './products.component.html',
  styleUrls: ['./products.component.css']
})
export class ProductsComponent implements OnInit {

  title: string = 'Products';
  products: Product[];
  error: any;

  constructor(private _productService: ProductsService) { }

  ngOnInit() {
    // Replaced with products service
    // this.products = [
    //         new Product(1, 'Product 1', 10),
    //         new Product(2, 'Product 2', 20),
    //     ];

    this._productService.getProducts()
      .then(products => this.products = products)
      .catch(error => this.error = error);
  }
}
See It in Action
It’s finally time to run the front and back ends of your Angular-Express application at the same time. But for it to succeed, you’ll need to add a proxy to the back end so that calls to the Web API on port 4200 will be sent to port 3000 instead. Add a file to the project root called proxy.conf.json with the following content:
{
  "/api": {
    "target": "http://localhost:3000",
    "secure": false
  }
}
Then update the start script in package.json to append a proxy-config parameter.
"start": "ng serve --proxy-config proxy.conf.json"
With the back end proxy configured, you can start the Express Web API by running the serve-api gulp task. Then you can start the Angular app by running npm start. You should now see a list of products that have been retrieved from the Web API.

Clone, fork or download the code for this post: https://github.com/tonysneed/Demo.Express.Angular-CLI
Congratulations! You have used Angular CLI to scaffold a front end to an Express Web API back end. Because the front end is independent of the back end, there’s nothing to stop you from swapping out the Express implementation for another technology stack, such as ASP.NET Core, without affecting the Angular front end.


First you were my WCF guru, then you became my MVVM guru. Now you are my Web Api and Angular 2.0 guru.
Thanks, Tony.
Burton Roberts
Extended Day Services
There is an error at the file app.module.ts. change line
import { ProductsService } from ‘./shared/products.service’;
to
import { ProductsService } from ‘./shared/services/products.service’;
By the way this needs two web servers to run. Is there an easy way to serve the angular app from within express js?
Thanks for catching the error, which I’ve fixed in commit bb29c6b.
Good question. I intentionally set it up this way to maintain a cleaner separation of concerns between the Express and Angular pieces. This makes it easier to swap out Express for another back end, such as ASP.NET Core, without affecting the front end. Also, having two web servers allows you to make changes to either the front or back end without recompiling and restarting the other side. For example, you can keep the Express service running while making a change to the Angular app, and vice versa.
Starting both servers in VS Code is easy. Just press Cmd + P, type
task serve-api. Once the Express service starts, press Cmd + ` to open the integrated terminal in VS Code, and enternpm start.Have said that, it’s not hard to set up the Express part to support static files, so that you can use nodemon for both the front and back ends at the same time. See this gist for an example. The disadvantage is that you lose the live browser reload that ng-serve offers.
The code for the ProductService doesn’t work: Generic type ‘Promise’ requires 1 type argument(s).
Thanks for your reply, from your git repo I solved it:
https://github.com/tonysneed/Demo.Express.Angular-CLI/blob/master/src/app/shared/services/products.service.ts
Not sure if this can be classified as “scaffolding” as the CLI is merely generating starter files and codes and you have to write the rest (classes, objects, properties, .. etc)
I miss dynamic data scaffolding from .NET where you just point to a database with tables and EF does its magic and you get a ready to use CRUD web application within minutes
I hear you. Mostly you will hit a RESTful Web API from the front end. I don’t know if it exists, but it would be nice to have a way to integrate Angular-CLI with Swagger.
Thank you for making this article.
I have query: In this article, we have to run Express as a separate application and angular as a separate application.
How do i combine this two things. I want to run only one application(i.e. express) and in that express server, i want my angular to load as a default route eg. (“localhost:3000/”).
How do i do this. Please let me know.
I have a sample that shows how to run Express and Angular in a single application. The key is to configure express to include the Angular app, which you can do with
app.use(express.static(staticRoot)). You should also include the node_modules folder. The complete sample can be found here: Demo.Express.Angular-Unified. Cheers!Thank you for this…