
Some time ago I wrote a blog post series on Getting Visual Studio Code Ready for TypeScript. The ultimate goal was to build a TypeScript library with Visual Studio Code by stitching together all the pieces you needed to compile TypeScript into JavaScript, produce TypeScript declarations to enable intellisense for consumers of your library, and provide automated unit testing with Jasmine and Karma with a build server such as Travis CI. Gulp was the engine automating all these tasks, and I created a Yeoman generator to let you scaffold a shiny new TypeScript library project with very little effort.
See the code for TypeScript Library Starter Lite here: https://github.com/tonysneed/typescript-library-starter-lite
See a sample app produced by TypeScript Library Starter Lite here: https://github.com/tonysneed/ts-lib-starter-lite-demo
As compelling as this vision seemed to be at the time, it involved a lot of interconnected moving parts that could easily get out of sync, break down and interrupt your development workflow. The gulpfile alone contained nearly 300 lines of code with a config file containing another 150 lines of code. And many of the parts were being deprecated frequently and had to be constantly updated.
So when it came time for me to write a bona fide TypeScript Library, I started to look elsewhere. It was then that I ran across an interesting project called TypeScript Library Starter, which looked quite promising. Simply by cloning the repo and running npm install, you get a TypeScript library that you can test, lint, build and publish to npm. So I gave it a test drive and found it mainly lived up to its promises. However, I found it a bit too opinionated for my taste because it included things like conventional commits and automated semantic releases, which I feel are a too constraining for me personally. For example, based on the Git commit message, the package is automatically versioned and published to npm, which scared me somewhat. And I was unable to get it to publish pre-release versions (alpha, beta, rc, etc).
On the plus side, building the project produces a dist folder with an entry point for your exported modules, TypeScript declaration files for intellisense, and documentation using jsdoc style comments in your code. Nonetheless it lacked a few things I like to have in my projects, such as linting with Codelyzer using Angular Style Guide rules and config files to support testing and debugging with keyboard shortcuts for Visual Studio Code.
So I decided to Fork the author’s repo to create my own version without some of the more opinionated features, while including other things I find appealing.
Getting Started
Just like the original TypeScript Library Starter, to use my “lite” version all you have to do is clone the repo and then run npm install.
# Clone the repo into a folder with your project name
git clone https://github.com/tonysneed/typescript-library-starter-lite.git YOURFOLDERNAME
cd YOURFOLDERNAME

# Run npm install and write your library name when asked
npm install
When prompted for a library name, you can either use the folder name where the project is located or another name of your choosing. Keep in mind that this will be your package name when publishing to npm.

If you open the project in an editor such as VS Code, you’ll notice a series of scripts in the package.json file. The main ones you’ll be using are lint, test and build. If you take a peak inside the .vscode folder, you’ll see key bindings for both Mac and Windows. If you’d like to associate the npm scripts with some standard keyboard shortcuts, just copy the contents of either file, then select the Keyboard Shortcuts menu under Preferences, click the keybindings.json link you see there, and paste the shortcuts you just copied. Then you can simply press Ctrl+Shift+L to lint your code, Cmd+Shift+T (Mac) or Ctrl+Shift+T (Windows) to run unit tests, and Cmd+Shift+B (Mac) or Ctrl+Shift+B (Windows) to build and produce output to the dist folder. All of these will execute in the integrated terminal in VS Code, and you can terminate a running task (such as test) by pressing Cmd+Shift+X (Mac) or Ctrl+Shift+X (Windows). To get even more goodness from VS Code, I recommend you also install some extensions: vscode-icons (pretty icons in the Explorer), TSLint (real-time linting), TypeScript Hero (organizing imports) and Move TS (renaming/moving files).
The default TypeScript target in my “lite” starter kit is ES2015, so you can take advantage of advanced JavaScript features (such as proxies) not available in legacy browsers (i.e., Internet Explorer). However, to get the broadest reach, you can elect to target ES5, either by changing the target to “es5” in tsconfig.json (as well as the “module” suffix in package.json), or you can simply clone from target-es5 branch in my starter kit repo.
If you take a peek inside the src directory, you’ll see a few files placed there to get you started. The dummy.ts file contains a DummyClass with a getPerson method, and the dummy.spec.ts file has a Jasmine test that new’s up a Person class, which is imported from a person.spec.ts file inside the models folder. (The reason the model file has a spec suffix it to prevent it from inclusion in the generated docs.)

For exposing classes and other constructs from your library, there’s the TypeScript file that has the same name as your project. If you open the file, you’ll see an export for the Dummy class, which you can replace with exports from your own modules for classes in your library.
export { Dummy } from './dummy';
Linting, Testing, Debugging, Building
When you run the lint task, the starter kit applies a set of rules to make sure your code uses standard TypeScript conventions. I like to use the Angular style guide, so I configured TSLint to use the same rules as for Angular applications.
The starter kit uses a test runner called Jest, which is a JavaScript testing framework developed by Facebook that has zero configuration and be default only runs tests that have changed since your last commit, unless you specify all tests or apply a filter.

I’ve included support in the starter kit for debugging Jest tests with a launch.json file located in the .vscode folder. All you have to do is set a breakpoint in a spec file, start the tests by pressing Shift+Cmd+T (Mac) or Shift+Ctrl+T (Windows), then press F5 to start debugging. You should then hit your breakpoint, where you’ll have all the debugging goodness of VS Code at your disposal, including stepping into code, adding watches, viewing local variables, inspecting the call stack, and interacting with the Debug Console.

When you build the project, a dist folder is created that contains the output files for your library, TypeScript definition files, and docs that use jsdoc comments from your source files and that will be published to a GitHub Pages branch in your repository. I recommend a VS Code extension called Document This for adding jsdoc comments with a keyboard shortcut, which allows them to show up in intellisense for someone consuming your library.

Continuous Integration
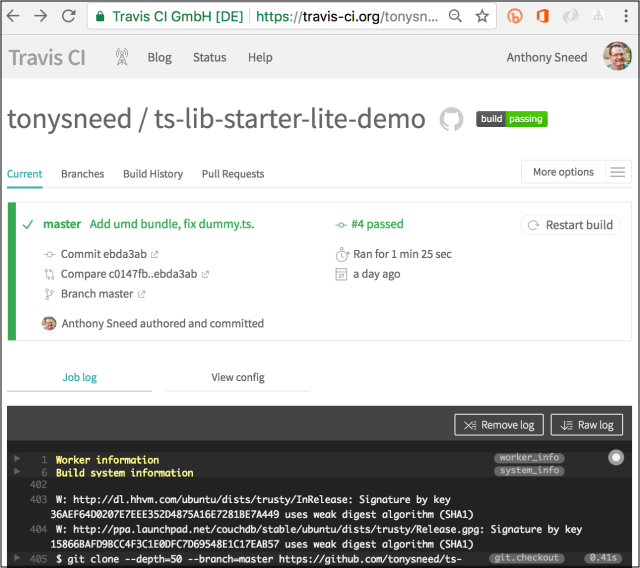
TypeScript Library Starter comes with support for continuous integration with Travis CI, but you first need to create an account in Travis if you don’t already have one. Then you need to add your GitHub repo to your Travis account, so that pushing commits and creating pull requests will trigger a CI build that runs your tests and updates the docs. Then you’ll need to prepare your repo to use semantic-release to allow Travis to publish your docs.
To get this to work you need to perform a few simple steps. First, make sure you have published your project to GitHub. I find that using the GitHub Desktop app is the easiest way to do this. Then make sure to copy the clone URL and paste it into the repository “url” field in the package.json file. Next, run the following command to prepare the CI hooks.
npm run semantic-release-prepare
Then install semantic release and run it, answering “No” when prompted to create a travis.yml file.
npm install -g semantic-release-cli
semantic-release-cli setup
Note that you’ll need to create an npm account so that you can enter your npm credentials when prompted. However, these credentials won’t be used in this starter kit because automatic releases have been disabled.
Once you’ve taken these steps, pushing a commit or merging a PR to your master branch will kick off a CI build that runs your tests and publishes your docs.
To see where the docs have been published, go to the Settings for your GitHub repository and note the GitHub Pages url shown there. Here’s a sample of what the docs generated by typeDoc look like.

Publishing
The full-featured starter kit provides for automatic releases and publishing to npm, with a changelog written to an auto-generated release on your GitHub repo — but I like to retain complete control over my releases. So with TypeScript Library Starter Lite, you’ll want to create a versioned release on your GitHub repo with a list of issues addressed by that release. To help with this process you can create milestones and assign issues to them, as well as use a project management tool, such as GitHub Projects or ZenHub.
Before publishing your library to npm, I recommend you first test it locally. But rather than using npm link and unlink, which didn’t work for me consistently, I use npm pack to test my library locally before publishing to npm. This creates a tarball named after the name of the project, plus the version specified in the package.json. Then you can install the package, for example in an Angular test app.
cd path/to/your/project/
npm install --save ../path/to/your/npm/packagename-version.tgz
When you’re ready to release your wonder to the world, you can publish your package to npm with the npm publish command.
npm publish
After supplying your npm credentials, your package will magically appear on npm for all the world to see and use.

If you make a mistake, you can just bump the version number, or if desired you can unpublish one or all versions of your package and publish it again. (Make sure no one else has installed your package!)
With the power of TypeScript Library Starter Lite (or the full featured starter kit), you can test, build and publish your own TypeScript libraries with ease and confidence. A great deal of thanks goes to @alexjoverm creating an amazing TypeScript library starter kit that I was able to tailor and streamline.
Enjoy!


